Roon Room Correction
Roon is music playback software that is compatible with a large number of audio systems. An interesting feature of Roon is its architecture. The brains of a Roon system is the “Roon Core”, which sends audio to playback devices. The Roon Core has a DSP Engine which makes room correction possible on any playback device.
HouseCurve is an iOS application for tuning audio systems. It turns your iPhone/iPad into a capable audio analyzer using the built in microphone. It can be used for tuning tasks like creating room correction filters, subwoofer time alignment, level matching and choosing crossovers. Download here.
This app note will demonstrate room correction using HouseCurve and the convolution feature of Roon’s DSP Engine.
For an introduction to room correction, please read the overview. To learn more about taking measurements with HouseCurve please see the usage documentation.
You can also check out the Roon community forum for more information or to ask for help. There’s a dedicated topic on this app note if you’d like to share your results.
What you need
- An audio system running Roon.
- A MacOS or Windows computer with the Roon control software installed.
- An iPhone or iPad with HouseCurve installed.
Roon’s mobile app doesn’t currently support loading convolution filters, thus a computer is needed to perform the load. You can let Roon know you would like this capability by voting here.
HouseCurve achieves reasonable measurement accuracy with the built in iPhone or iPad microphones. For more information see microphones.
For best results, ensure the audio system is set up correctly before applying room correction.
1. Get Connected
HouseCurve measures your audio system by listening to it play a sine sweep test signal. There are several ways to do this as described in connecting.
For this app note, we will perform measurements using external stimulus. This method doesn’t require a direct connection to the audio system. Instead, we transfer the test signal as a wav file to the audio system and play it manually. HouseCurve will measure by listening to the test signal as it is played.
This method will work with any audio system, but it requires more steps. If you like, you can skip this and connect HouseCurve to the audio system using Bluetooth or AirPlay. As long as the signal passes through the Roon Core, you will get the same result.
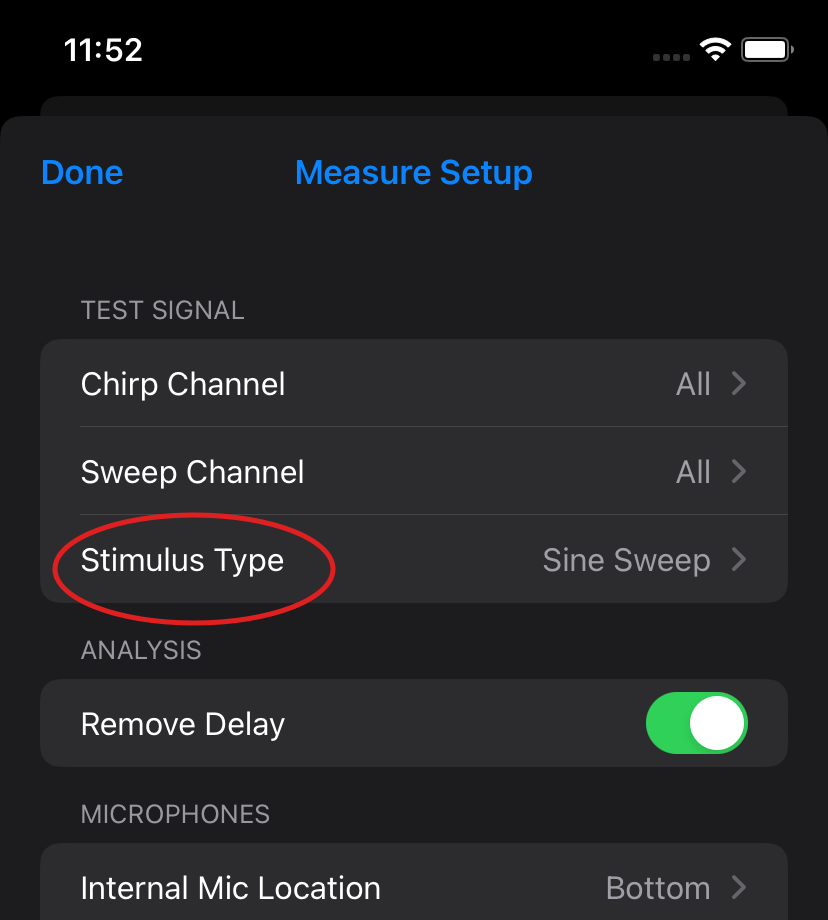
Launch HouseCurve on your iPhone/iPad. Tap  to display the Measure Setup screen, then tap External Stimulus.
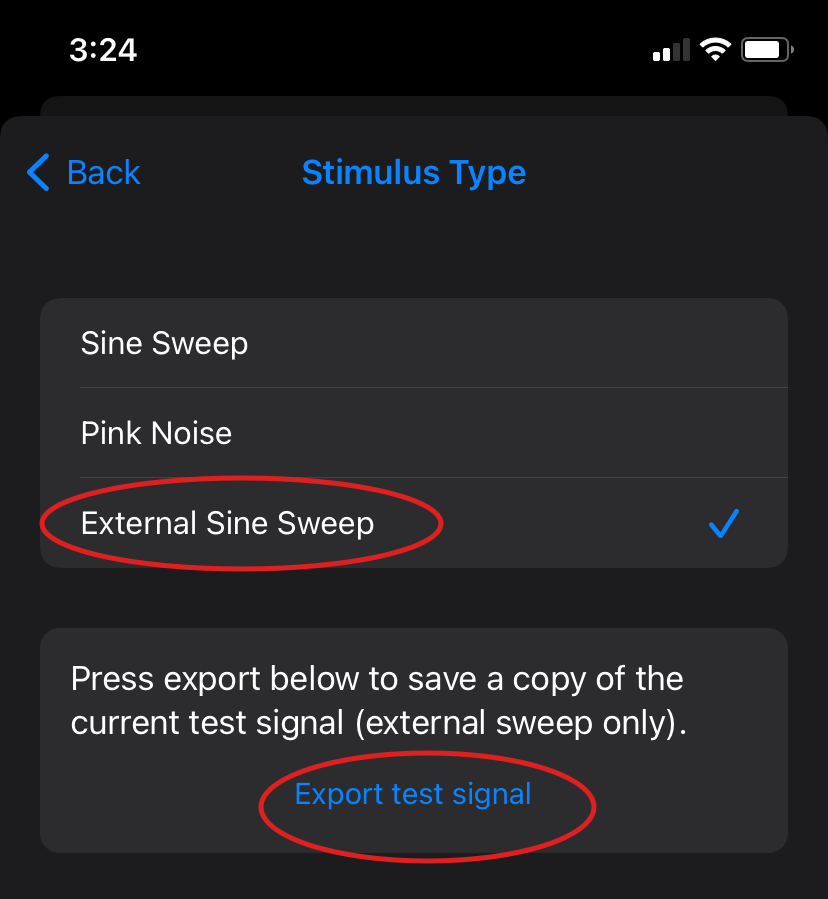
Turn External Stimulus on. Tap Export test signal and select a location to save the wav file. Add this file to your Roon Library using a Music Folder (etc).
You should now be able to play the test signal through your desired audio zone using Roon.
2. Collect Measurements
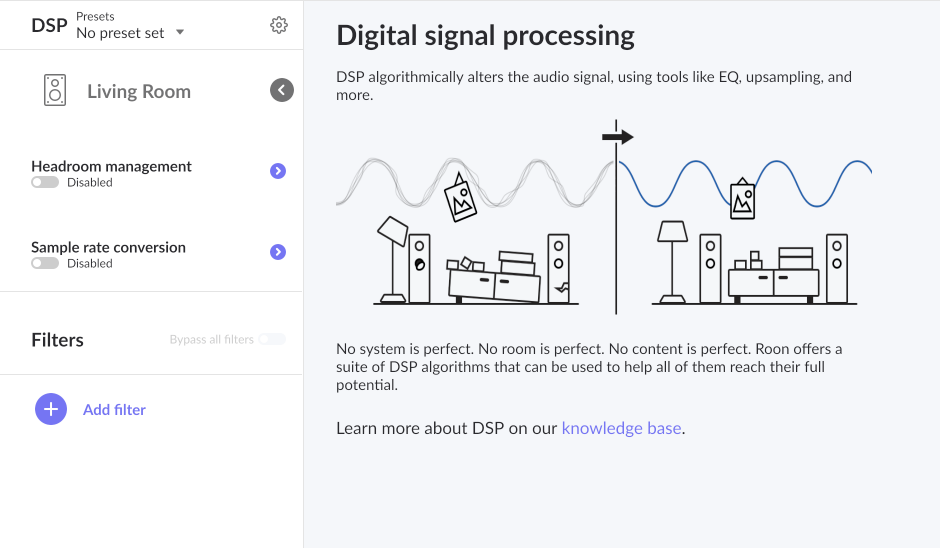
Using the Roon control software on your MacOS or Windows computer, access the DSP Engine for your audio zone. Ensure that equalization is disabled.
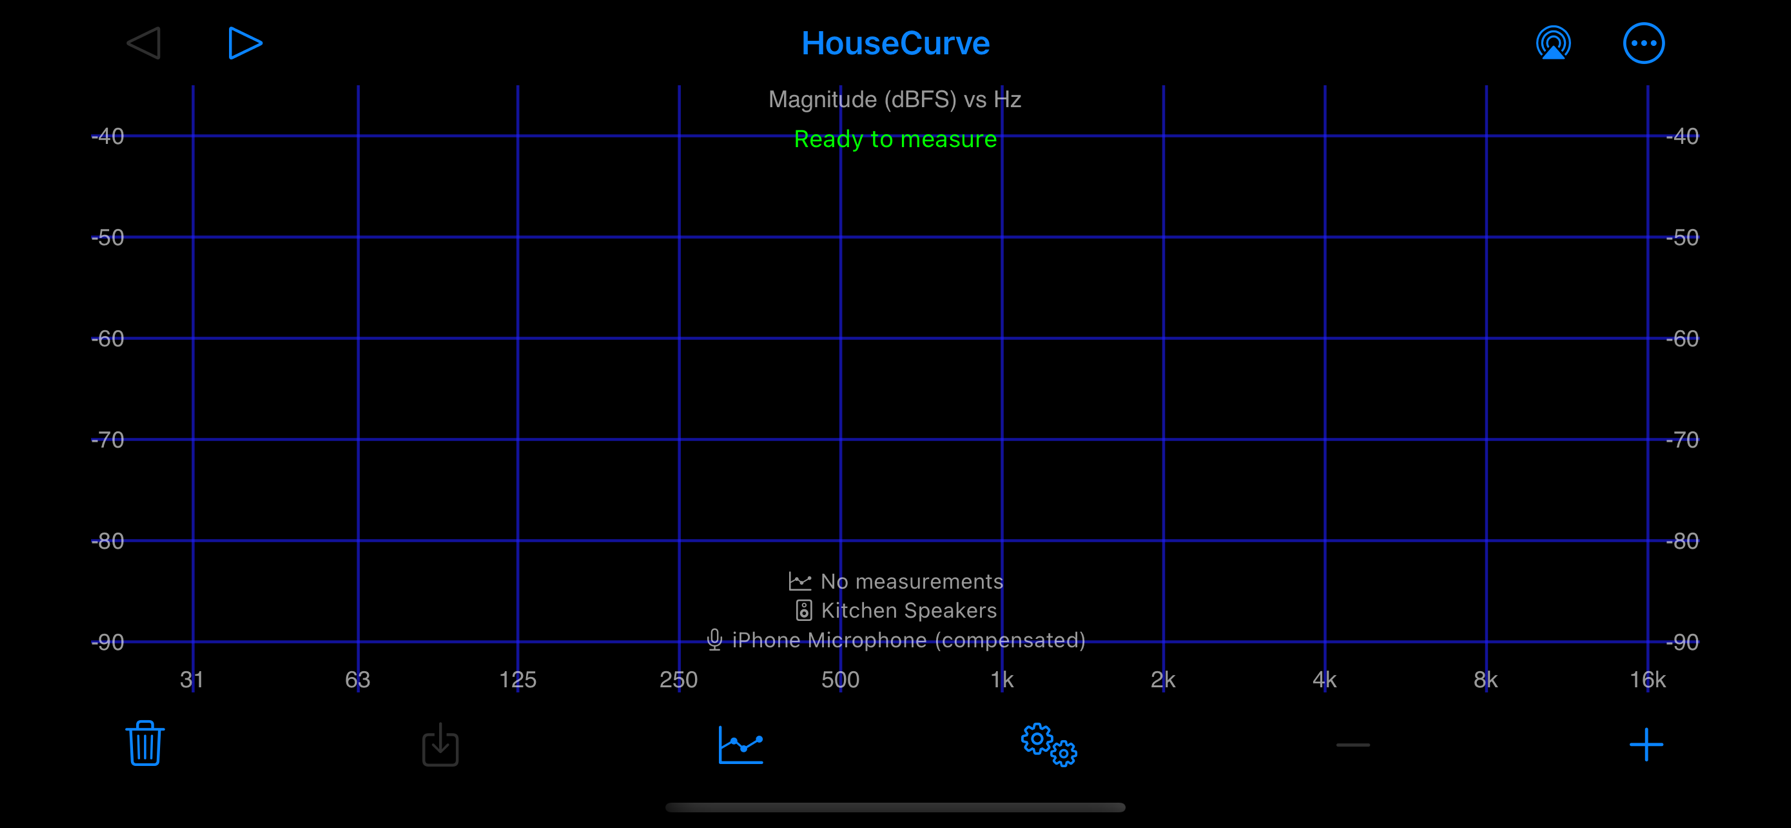
Launch HouseCurve on your iPhone/iPad. Tap  to clear previous measurements.
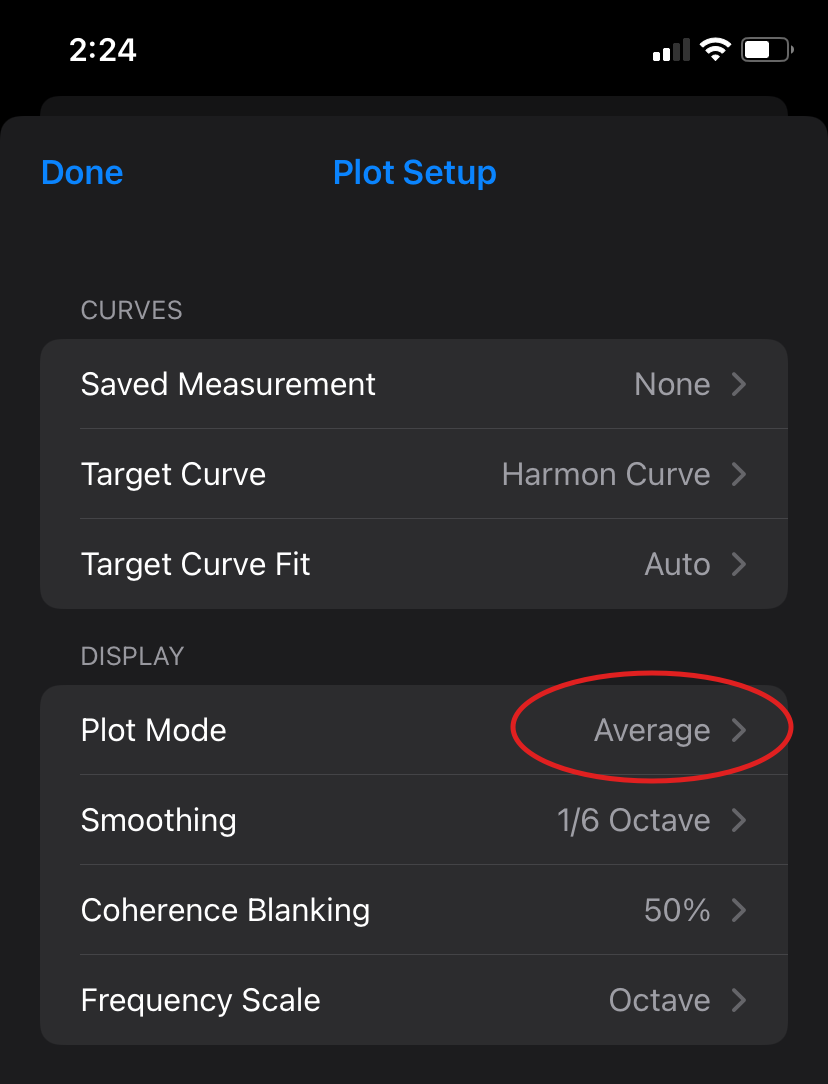
Tap  to display the Plot Setup screen. Ensure that the plot mode is “average”.
To measure with external stimulus, first tap  on HouseCurve to start the measurement process. Then use Roon to play back the test signal. Ensure that the iPhone/iPad microphone is pointed in the direction of the speakers. Measure at a normal listening volume.
Note - HouseCurve must remain in the foreground to measure. If you need to trigger playback with the same device, start a looped playback, then switch back to HouseCurve to start the measurement. HouseCurve will only collect one measurement at a time.
HouseCurve will automatically average measurements as they are collected. To get a realistic measurement of your listening area, it is important to average measurements from several locations. For a desk (near field), try measuring from 2-3 locations. For a living room, try 3-5 locations.
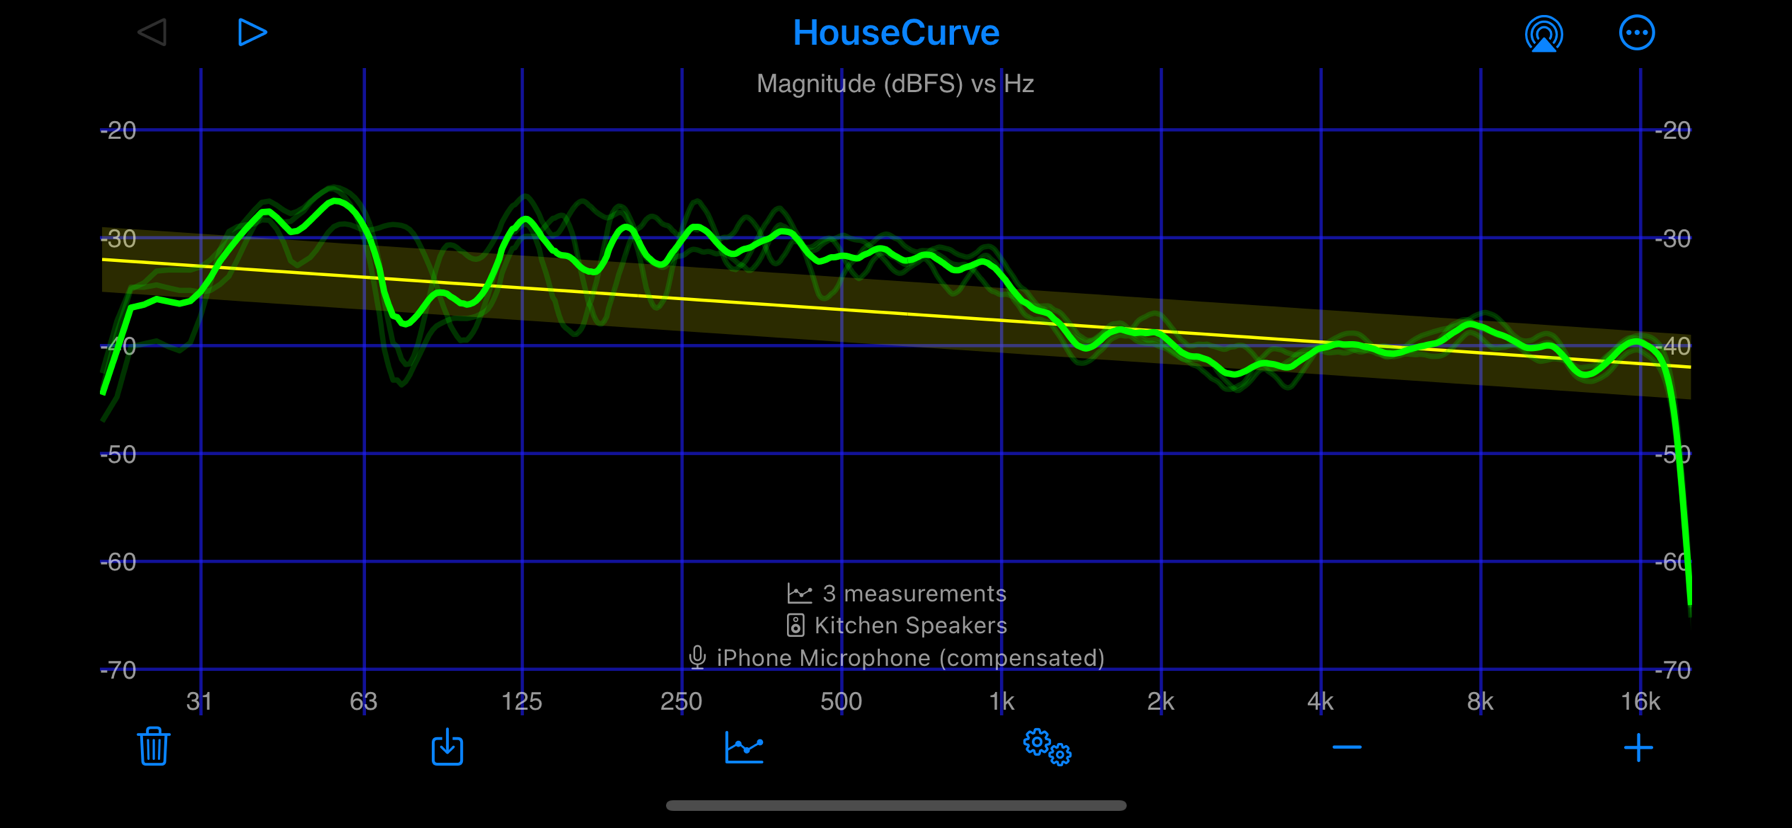
When you are satisfied with the average measurement, save it by tapping  . The saved measurement will be used to generate the room correction filters.
3. Generate Filters
Go to the main menu and choose the Equalize tool.
The Equalize tool generates PEQ (biquad) or FIR filters to correct a saved measurement to a target curve. Either filter type can be exported as an impulse response and loaded into Roon’s convolution engine. For this application note, we’ll use the FIR filter as it has good low frequency resolution, resulting in smoother bass and nicer sound stage/imaging. If you’re curious, try both filter types and see which one you like better.
The generation process is instantaneous, so the display automatically updates to reflect any setting change (target curve, saved measurement, filter settings, etc).
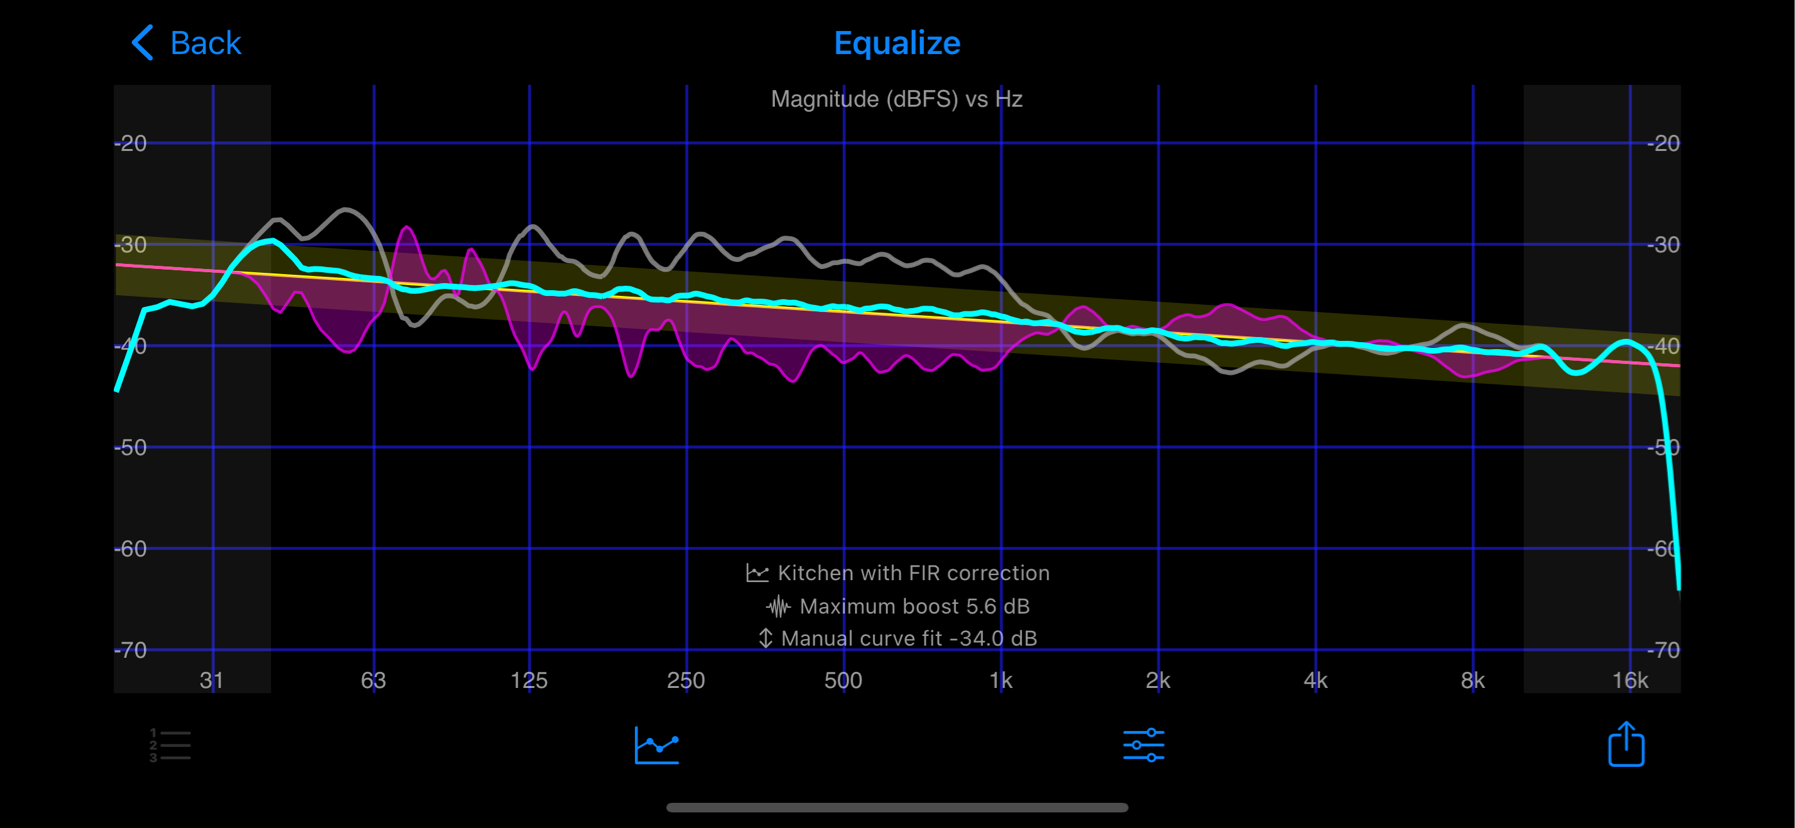
HouseCurve corrects regions with the largest deviation from the target curve, preferring lower frequencies and ignoring areas with low coherence (SNR). You can adjust the target curve and coherence blanking threshold by tapping  . For more information, see gain management.
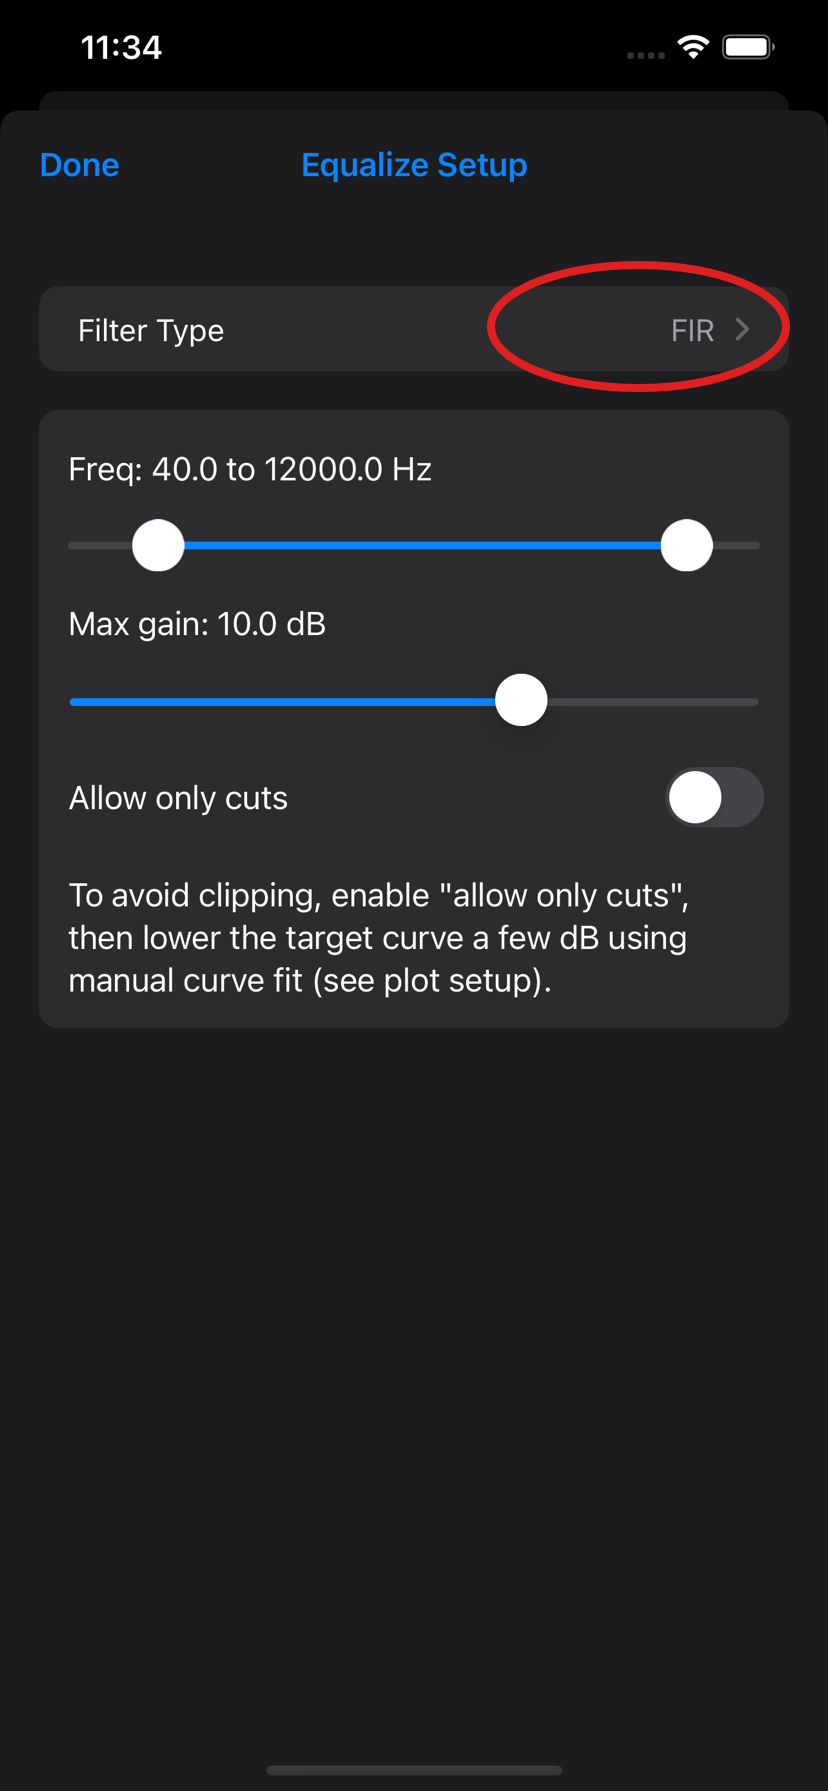
Tap  to display the Equalize Setup screen. Set the filter type to FIR. The default settings should provide a good correction, but feel free to experiment.
4. Export Filters
Filters can be exported to a file by tapping  . FIR filters are exported as an impulse response in WAV format. Ensure the sample rate is appropriate for your audio system. When in doubt, choose 44100 Hz. Roon will automatically resample the filter as needed. You can also export with several different sample rates and Roon will pick the closest one.
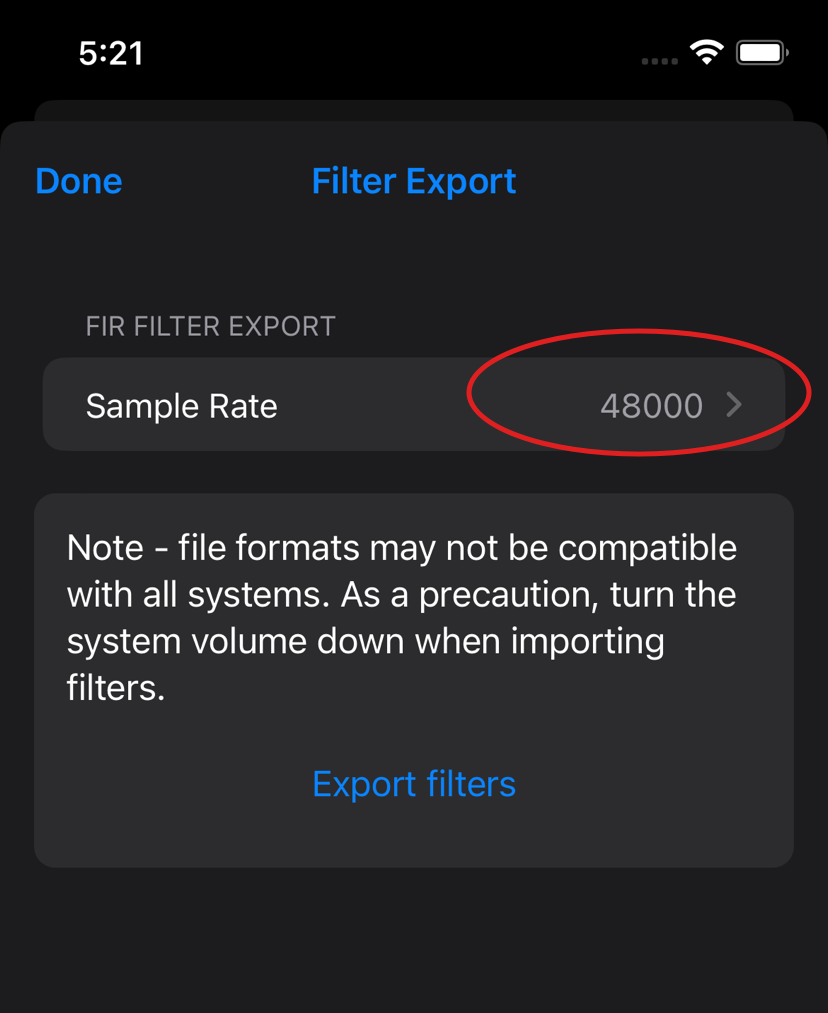
Tap Export filters, select a location for the filter file and then tap save. Choose a location that the Roon control software can access. Alternatively, you can choose a location on the iPhone/iPad and then transfer the file using email, AirDrop, iMessage, etc.
5. Load Filters
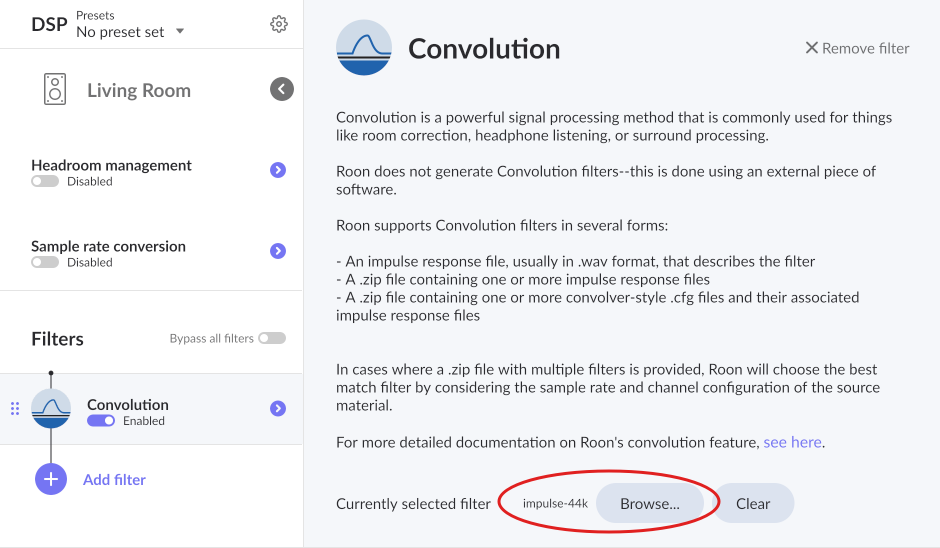
Go to the DSP Engine for the measured audio zone and add a convolution by pressing Add filter. Load the filter by pressing Browse.
6. Headroom Management
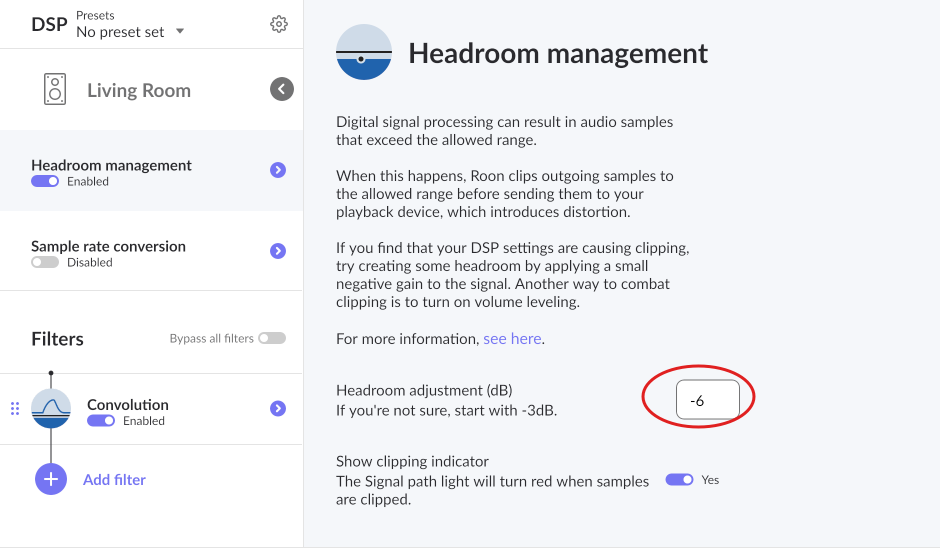
Ensure that Headroom management is enabled. Convolution can increase the overall system gain, causing clipping. To compensate, the “headroom” can be adjusted. Use the maximum boost as a starting point for this adjustment. If the value is large, it may be necessary to change the equalization settings, see gain management.
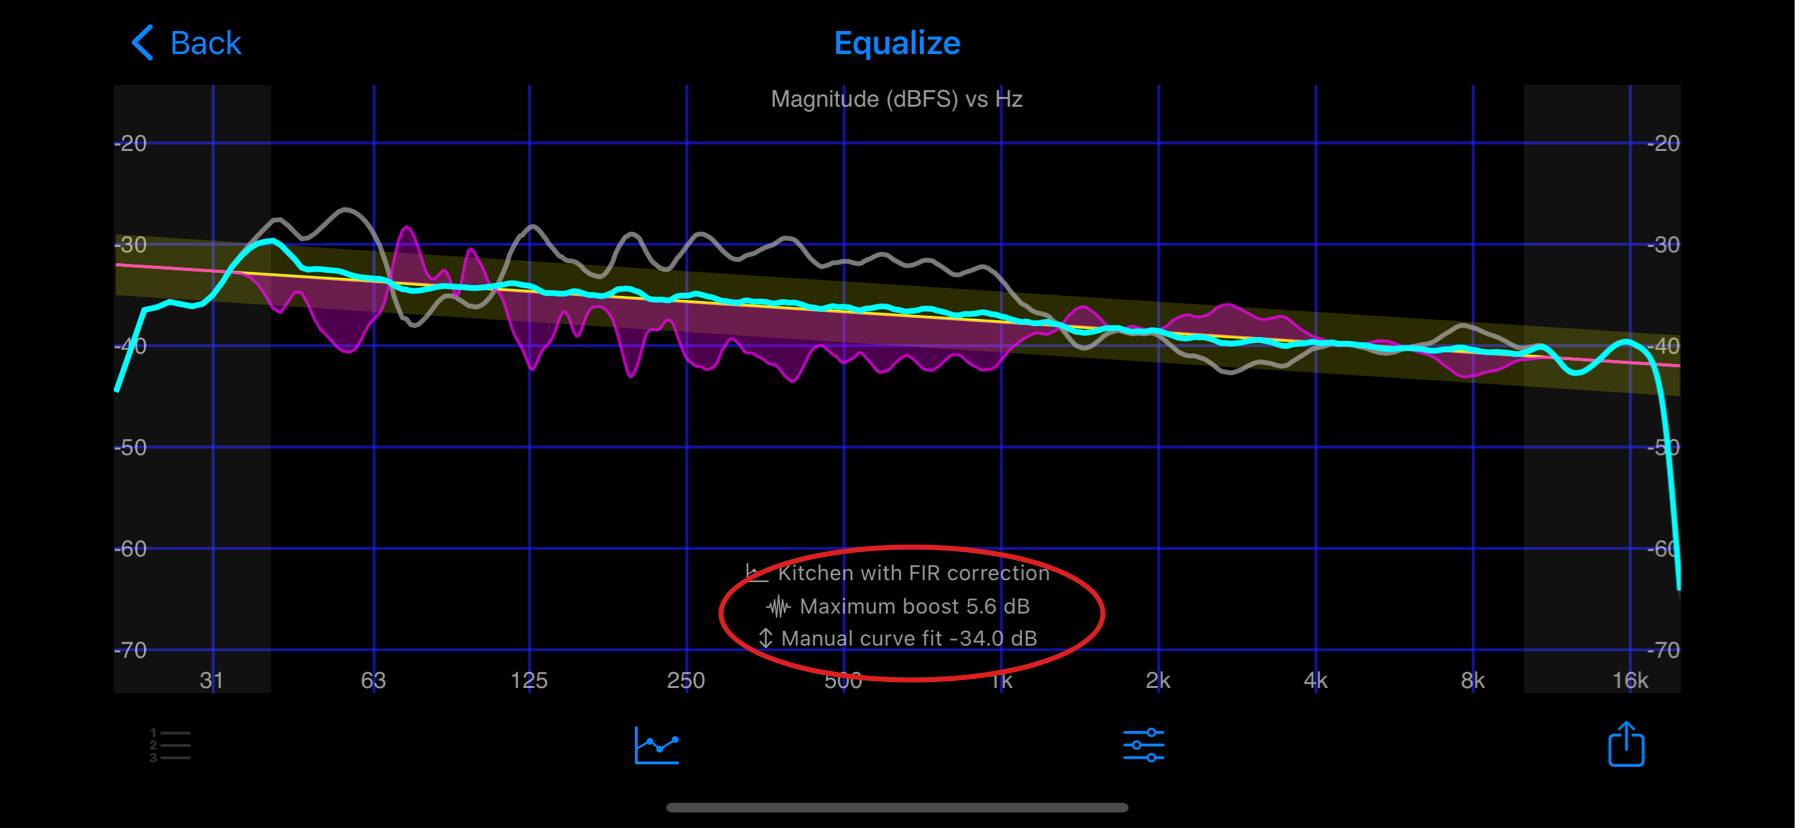
To compensate for a maximum boost of about +6 dB, enter -6 dB. Enable the clipping indicator to see if the headroom adjustment is sufficient.
Wrapping Up
With the filters loaded, you can repeat the original measurements to confirm that your system now matches the target curve. The average should be reasonably close to the response predicted by HouseCurve. Happy listening!